

Ever noticed air bubbles inside your dosing tubing and wondered, “Will this affect dosing accuracy?” Don’t worry—AUTOAQUA has compiled a complete guide to help you understand why bubbles form and how to resolve them easily. With proper installation and a few simple tips, you can enjoy worry-free dosing every day!
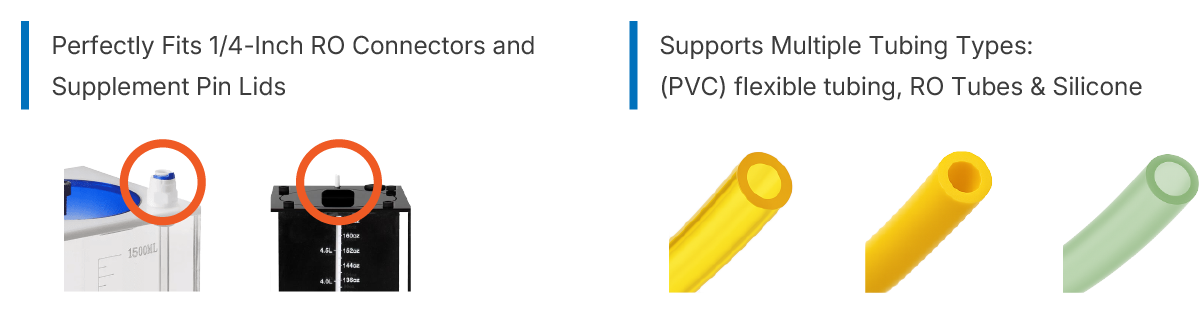
Smart Doser comes with 6.4 mm outer / 4 mm inner diameter PVC tubing as the standard inlet tubing size. Here’s why we chose it: ● High Compatibility – Perfectly matches most dosing container connectors on the market. ● Flexible Setup – Prefer using 1/4” RO hard tubing? Swap it in effortlessly—no adapter needed. This universal design not only simplifies setup but also helps minimize the risk of air leaks due to loose fittings.
★ Want to use silicone tubing? Simply pair it with our 1/4" Stem to 3/16" Hose Connector (SH-1043) Silicone Tubing Adapter—Smart Doser is ready to go.
Under normal conditions, as long as your dosing container contains supplement and the tubing is properly inserted, air will not enter through the inlet—ensuring stable and accurate dosing.
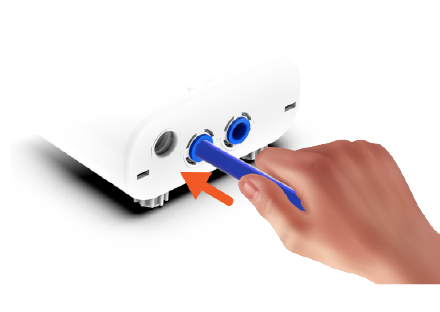
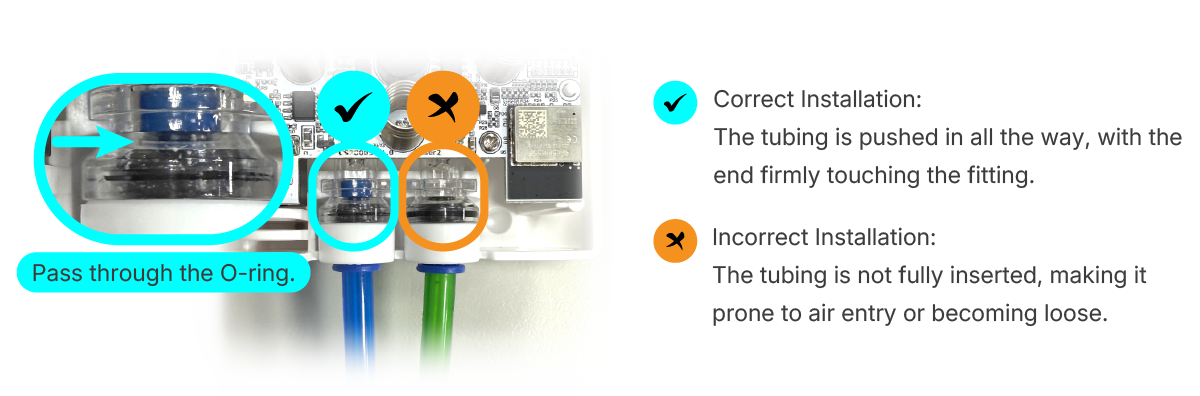
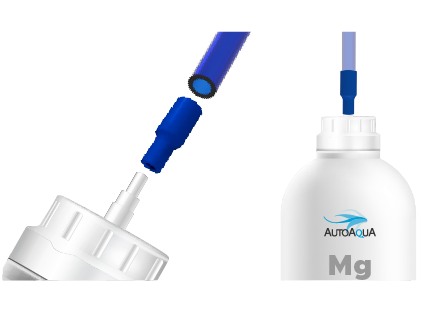
Proper tubing installation is the key to avoiding trapped air. Here’s how to do it right: 1. Firmly insert the tubing into the 1/4" quick connector. As you push, you’ll feel two points of resistance as it passes through the internal black O-ring.
2. Double-check that the tubing is fully seated and tightly sealed. If needed, disassemble the device and visually confirm that the tube reaches the bottom of the fitting.
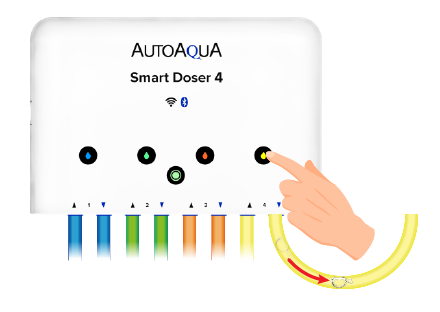
If you notice the pump indicator flashing red but your dosing container still contains supplement, it’s likely that air has entered the tubing and is trapped near the optical sensor inside the inlet tube.
This air bubble can cause the sensor to mistakenly detect an "empty supplement" and trigger the red warning.During this time, calibration will be temporarily disabled, but the normal dosing functions will continue to operate as usual.
Even if tubing is properly installed, tiny bubbles may gradually appear in the outlet tube over time.
This happens because the supplement's surface tension isn’t strong enough to completely hold back atmospheric pressure, allowing microbubbles to form.
★The good news: These bubbles do not affect dosing accuracy. However, if you want a cleaner look or complete peace of mind, here’s how to fix it.
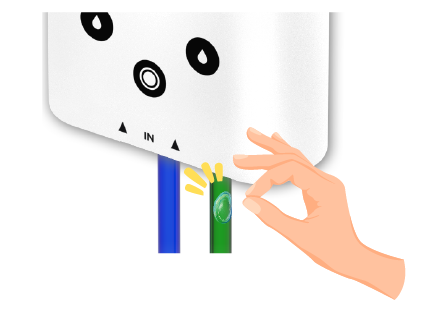
Gently flick the inlet tubing and run a manual dose to push air through the sensor and out of the system.
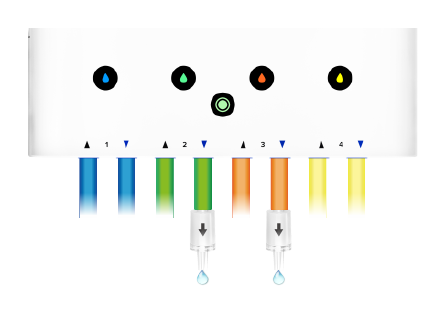
Lift the outlet tubing upward and start a manual dose to release trapped air.

Avoid U-shape tubing, which can easily cause trapped air. Use the included L-type quick connector to create a smooth flow path and prevent dead zones.
AUTOAQUA Anti-Siphon Valve is check valve as well. Use it to prevent the backflow of air. Learn more about the Anti-Siphon Valve (SV-100)
This silicone adapter narrows the outlet diameter and seals tightly with dosing container caps, helping to eliminate bubble formation at the connection point. Learn more about the 1/4" Tubing Reducer (TR-0403)